Course Layout Overview
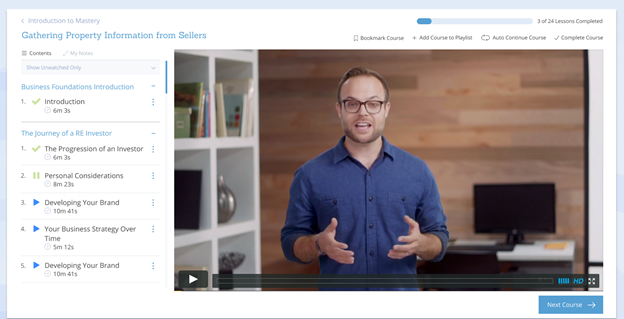
The course layout consists of the following sections: Course Options Bar, Course Content List, Course Video, Course Resources Tab, and Related Electives.
Return Option
An option to return to the curriculum or phase is available at the top left of the course page, above the course title.
Course Progress Bar
A course progress bar is available at the top left-hand side of the course page. The progress bar displays the number of lessons completed in the following format: XX of XX Completed.

Things to Note
- The Course Progress indicator will automatically update as lessons are marked as complete.
Next Course
The ‘Next Course’ button allows users to manually proceed to the next course. It is displayed on the right, below the video player.
Things to Note
- If users prefer the system automatically redirect them to the next course, they can enable the Auto Continue The Auto Continue feature will automatically redirect to the next course in a series once the current course is complete. Additional information is available below.
Course Options Bar
The Course Options Bar provides the ability to perform functions and manage preferences on a course. The options bar is displayed in the top-right hand corner of the course page.

Bookmark Course
The Bookmark Course option allows users to add or remove the current course to their list of bookmarks.
Toggle the Bookmark Course Option
By default, a course will not be bookmarked inside of a user account. To bookmark a course, click on the Bookmark Course option.
- If a course is not bookmarked, then the icon and text will be in black. Example of how the option looks when a course is not bookmarked:

- If the course is bookmarked then the icon and text will be displayed in green. Example of how the option looks when a course is bookmarked:

Reminder: Courses that are bookmarked will be displayed on the ‘My Notes and Bookmarks’ page of the users account.
Add Course to Playlist
The Add Course to Playlist option allows users to add the current course to a new or existing playlist.
Toggle the Add Course to Playlist Option
By default, courses are not included in user playlists until they are added manually. To add a course to a playlist, click on the Add Course to Playlist option.
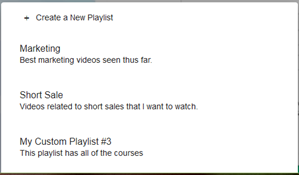
A popup window will appear from the bottom of the screen with the option to Create a New Playlist or select an existing playlist to add the course to.
The following details are shown for each playlist listed:
- Playlist Title – The name of the playlist.
- Playlist Description – The description of the playlist that was added by the user.
Create a New Playlist
To add a course to a new playlist, click the ‘Add Course to Playlist’ option and select the ‘Create a New Playlist’.
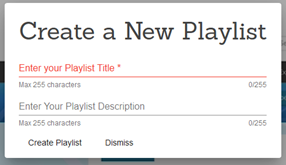
A new window will show with the option to add the details for your new playlist:
- Playlist Title – The name of the playlist.
- Playlist Description – A description of the playlist that will serve as a reminder of the contents.
Once the details have been added, click Create Playlist to save the new playlist.

- If the playlist has been successfully created, a confirmation message will be displayed at the bottom of the page.
- If there was an error adding the course, an error message will be displayed in the same format.
Add Course to Existing Playlist
To add a course to an existing playlist, select the name of the playlist to add the course to.
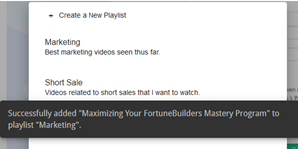
- If the course has been successfully added, a confirmation message will be displayed at the bottom of the page.
- If there was an error adding the course, an error message will be displayed in the same format.
Things to Note
- There will not be any visual indicator at the Options Bar level that will indicate that a course is a part of a playlist (e.g. the option will not turn green like other options).
- Users can access their playlists by going to ‘My Account’ -> ‘Edit Playlist’.
Auto Continue Course
The Auto Continue Course option will automatically redirect the user to the next course within a phase or curriculum.
Toggle the Auto Continue Option
By default, a course will not be set to Auto Continue. To toggle this feature, click on the option:
- If the Auto Continue option is disabled, then the icon and text will be in black. Example of how the option looks when it is inactive:

- If the Auto Continue option is disabled, then the icon and text will be displayed in green. Example of how the option looks when it is active:

Important Notice Regarding Auto Continue
Major web browsers like Chrome, Firefox and Safari have started to disable auto-play videos by default. Due to web browser auto-play policies, the Auto Continue feature does not necessarily mean that the course will automatically start playing when the system proceeds to the next course.
When a video finishes on the LMS, the system will proceed to the next lesson within a course. However, whether that next lesson plays depends on the user's browser auto-play settings. Note: Adjusting those settings falls outside of the scope of this User Guide and will need to be handled on a case-by-case basis.
Complete Course
The Complete Course option allows a user to manually mark a course as complete.
Toggle the Complete Course Option
By default, a course will not be marked as complete. To toggle this option, click on the Complete Course option:
- If the course is marked as incomplete, then the icon and text will be in black. Example of how the option looks when the course is incomplete:

- If the course is marked as complete, then the icon and text will be displayed in green. Example of how the option looks when the course is complete:

Course Content List
The Course Content List contains all the chapters and lessons included in the current course. Additional options are available for each lesson displayed in the Course Content List.
Content Filter
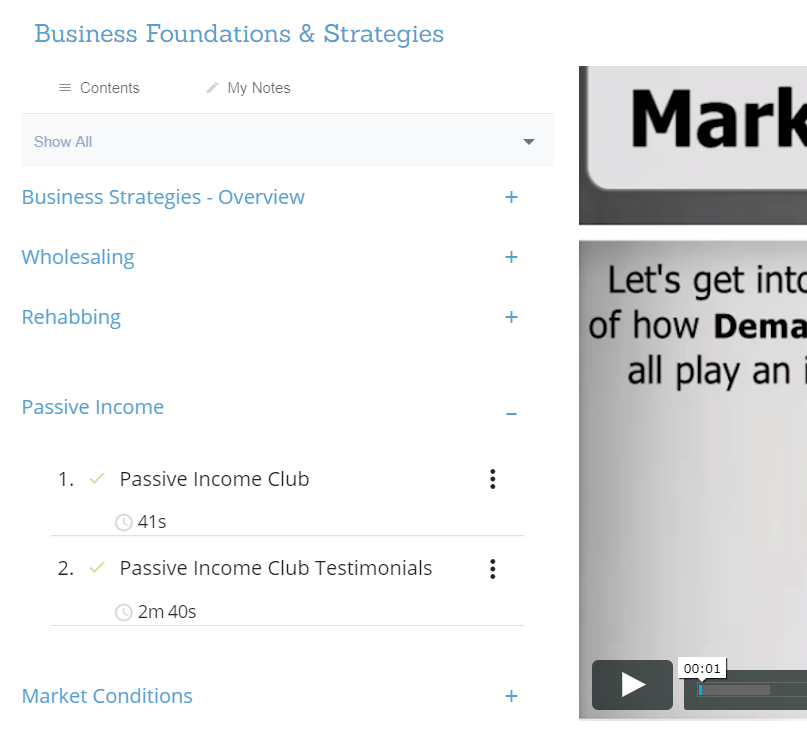
The content filter provides the option to filter the displayed chapters and lessons:
- Show All – Display all chapters and their respected lessons, regardless of whether they have been watched.
- Show Watched Only – Display only the chapters and lessons that have been watched.
- Show Unwatched Only – Display only the chapters and lessons that have not been watched.
Chapter List
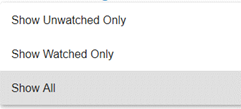
Chapter titles will be displayed in blue text, with all the lessons within that chapter displayed below.
Toggle the List
The name of a chapter can be clicked to toggle the option to expand or collapse the list of lessons under a chapter.
- If the chapter is collapsed, – and lessons within it are not shown – a plus sign will appear on the right of the chapter name. Example of how the option looks when the chapter is collapsed:

- If the chapter is expanded, – and lessons within it are shown – a minus sign will appear on the right of the chapter name. Example of how the option looks when the chapter is expanded:

Lesson Details
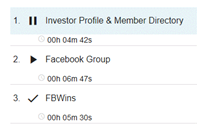
- Lesson Titles – The name of each lesson within a chapter.
- Lesson Duration – The duration for each lesson is displayed in XXh XXm XXs format.
- Play / Pause / Complete Lesson – An icon is displayed next to each lesson to indicate one of the following statuses:
- Play – The play icon indicates that the video is ready to play and/or has not been marked as complete.
- Pause – A pause icon shows when the lesson video is actively playing.
- Complete – A checkmark is shown if a lesson has been marked as complete.
Lesson Actions
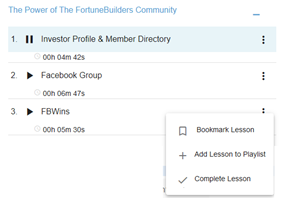
The following actions can be performed on each individual lesson within a course:
- Bookmark Lesson – Add the specified lesson to the list of bookmarks within the account.
- Add Lesson to Playlist – Add the specific lesson to a new or existing playlist.
- Complete Lesson – Manually mark the specified lesson as complete.
Things to Note
- If a lesson has been bookmarked or marked as complete, the respective text will be in green (like the course-level options).
My Notes
The My Notes section allows users to document ideas and important highlights while watching a specific lesson within a course.

My Note Details
Under the My Notes section, you will see a list of all existing notes on the current lesson, along with an option to add a new note.
Things to Note
- Notes are attached to lessons, not the course. If you add a note while watching lesson A, you will not see that note when viewing lesson B.
- All notes added can be viewed on the My Notes and Bookmarks page of an account.
Create New Note
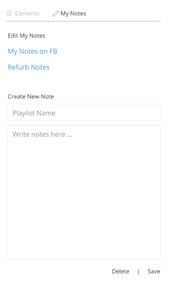
To create a new note, click the ‘My Notes’ option and then enter the note details:
- Name of Note – Enter the name of the note that is being added.
- Note Content – Add the contents of the note.
Available Actions
The following options are available:
- Reset Form – Click this option to clear all the content entered. Note: This option can be used if you select an existing note to edit and later decide to add a new note instead.
- Delete – Delete the new note and its contents.
- Save – Press to save any changes.
Edit My Notes
To edit an existing note, click on the name in the list and make the desired changes to the name of the note and the note contents. Once the desired changes have been made, press the ‘Save’ button.
Delete Note
Existing notes can be deleted by selecting the name of the note and pressing the ‘Delete’ option.
Confirm Note Deletion
You will be prompted to confirm before the note is deleted from the system:
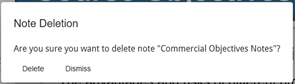
- To proceed with the note deletion, press ‘Delete’.
- To cancel the deletion process, press ‘Dismiss’.
Course Information Tabs
The Course Information Tabs contain a variety of important content like Tools & Resources, Action Plans, Course Description, and Instructor Information.
Tools & Resources
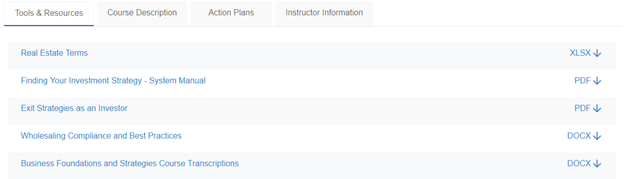
The Tools & Resources contains all the documents and files that are associated with the course, including PDF, Word, Excel, et al.
File Details
The following details are displayed for each document:
- File name – The name of the file.
- File format – The format that the file is available in, ie PDF, XLSX, DOCX, etc.
Things to Note
- The Tools & Resources section will not be displayed if there aren’t any files attached to the course.
Course Description
The Course Description tab shows the course description, time to complete, and the option to complete a survey on the course content.

Course Description
A summary of the course contents and learning objectives of the course.
Time to Complete Course
The time to complete reflects the amount of time it will take for a user to watch the course, based on lesson length. Note: This duration is currently entered manually when the course is added to the LMS.
Course Rating
Users will see an option to rate a course using a 5-star system, along with an option to Leave a Comment.
- Star Rating - To leave a star rating, users can click on the star to log their review.
- Leave Comment – A new window will be launched upon clicking the ‘Leave Comment’ option, presenting the user with a questionnaire to complete in order to leave a comment.
Action Plans
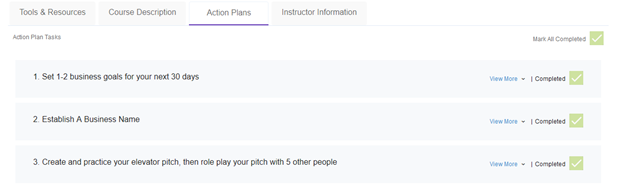
All tasks associated with a course can be found under the Action Plans tab.
Action Plan Details
The following details are displayed for Action Plans:
- Action Plan Task – The Action Plan task is the activity that a student will complete.
- Action Plan Description – The description provides additional details about the Action Plan task. A ‘View More’ option is available to expand the description in full.
- Action Plan Status – A checkbox is available to mark an Action Plan as complete.
Things to Note
- This system will automatically hide the Action Plans section if there aren’t any Action Plans attached to the course.
Instructor Information
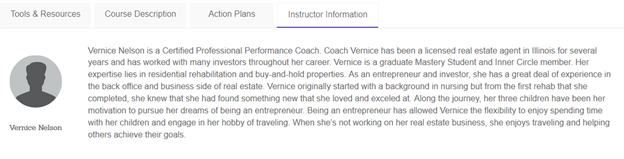
The Instructor Information section lists a short description about the instructor and their qualifications. Additionally, an image of the instructor is available.
Things to Note
If no instructor image is available, a default silhouette picture will be used (as shown above).
Recommended Courses
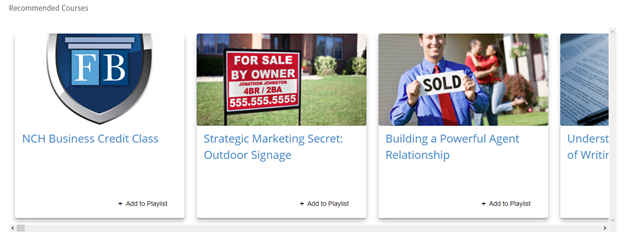
The Recommended Courses section displays elective courses that are in the same category as the current course.
Things to Note
- The Recommended Courses section is only displayed on core curriculum courses.
- The Recommended Courses section is not displayed on elective courses or trainings, i.e. live webinar recordings, live event recordings, etc.